How to Apply Foundation for Beginners

If you’re new to the world of makeup, foundation (as the name suggests) is a key starting point, creating additional glow to your complexion, helping to disguise blemishes and creating a smooth canvas to add your lip, eye and cheek colour to. How you apply your foundation is as important as the type of makeup you use - and all of them produce different effects - from sheer, everyday looks to full-coverage glam.
It might seem like the simplest part of the process - but with so many different formulas and methods of application available, it can be a little confusing to know where to start.To break it down for you, here is our guide on how to apply foundation for beginners - so you never have to deal with uneven coverage, incorrect colour - or those dreaded “tidemarks”.
1. Start with Good Skincare
Completely remove any trace of makeup with your preferred cleansing method (a quick swipe of micellar water using a cotton pad can be great for step one of this process - in addition to removing any remnants of makeup left behind after you wash your face).
In terms of skincare, find out what works best for your particular skin type. Everyone’s skin is different - so assess to see whether yours is dry, oily or combination and use the products that work best for you. This is important as when you’re adding your foundation you want it to accentuate, rather than mask your skin, so having your bare skin in tip top condition is a must.
Exfoliate
After cleansing and toning, exfoliate your skin - once a week should be enough. Manual forms of exfoliation (using a scrub or flannel) are useful for some skins - although in many cases this can be too harsh. A gentle, fruit-based AHA or BHA exfoliant is typically a good alternative for sloughing away dead skin cells and leaving a smooth, even finish.
After applying your moisturiser (ideally one with an SPF) time to soak in before applying your foundation, otherwise it could combine with whatever products are still on the surface of your skin, or otherwise make your skin slippy causing your makeup to slide off.
2. Choose your Level of Coverage
There are a number of levels of coverage to choose from. The one you pick depends on a number of factors, including purpose (for example, evening out skin tone) and overall look.
Light Coverage
Best for those requiring minimal coverage or for makeup users who dislike the feel of heavy makeup. The idea behind light coverage is not to cover up the skin completely . Light coverage formulas usually resemble a tinted moisturiser, BB or CC cream or will typically be labelled as light.
Medium Coverage
Medium coverage (as the name suggests) is a step up from light coverage and is generally considered the most popular, as these tend to come in buildable formulas allowing as much or as little coverage as you’d like. For added versatility, combining a little moisturiser with this type of foundation can help thin it out enough to produce a light coverage effect.
Full Coverage
Full coverage foundation can also be made more sheer using moisturiser - but in general it’s meant for heavy duty use such as photoshoots or special occasions. This type of foundation is also useful for covering redness, blemishes and hyperpigmentation - but use sparingly and build up gradually to avoid a “cakey” look.
3. Choose your Formula
The formula you choose will also have an effect on the level of coverage as well as your skin type. While oily-to-combination skins might benefit from using an oil-free or powder formulation, others might want to use something with added moisturisers or a silk finish to prevent the skin from appearing too dry.
Liquid
Liquid Foundations are available in light to heavy finishes, with varying levels of sheen (silk for a glowy look - or matte finishes, which tend to be oil-free). Some formulations can even adapt to your natural skin tone, giving a seamless, natural finish.
Tinted Moisturiser
Much like the moisturisers you already use, this type of foundation has added skincare benefits with a touch of pigment. Think of CC and BB creams as tinted moisturisers with a boost: these pigmented creams (introduced during the late 2010s when the trend for Korean beauty products was at its peak) contain SPF and a multitude of other skin-nourishing ingredients.
Cream Foundation
Cream formulas are generally found in pots or compacts, making them useful for touch-ups while on the move. Coverage is medium to full, but can be sheered out with a drop of primer or moisturiser.
Mousses and Whipped Formulas
Airy mousse formulas work especially well on oily skins and come in pots, pump dispensers and sprays. This liquid-cream hybrid is thicker than ordinary liquid foundation, yet lightweight, allowing for buildable, weightless coverage.
Loose Mineral Foundation
Although it initially began life in the 1970s, mineral foundation took off in a big way during the mid-2000s, providing sheer to full cover at the swipe of a brush. While touted as a good alternative for those with sensitive skins (due to minimal ingredients used) it does contain bismuth oxychloride - which can cause issues for delicate complexions.
Pressed Powder
Pressed powder foundations provide buildable coverage, but are generally not considered good for dry skins, as they can emphasise flakiness.
Stick Foundation
Stick foundation is a thick or solid cream formula offering medium to full coverage. Stick foundations also double up as concealer, making them convenient for travel. Allowing your stick foundation to warm a little before applying helps this particular type of foundation to go on smoothly.
Pancake Foundation
Synonymous with old-school glamour, this foundation was the type preferred by older generations who would keep it in a pretty, reusable compact to “powder their nose” while out and about. This formula can either be applied wet or dry, producing a sheer to full cover finish.
Airbrush
Though not frequently used at home, airbrush foundation is still worth knowing about - a thin formula generally used for editorials, on-screen use and special events, it’s designed to add sheer, soft and buildable coverage - and tends only to be used by trained makeup artists.
4. Shade
When choosing your shade of foundation, test it out on your jawline (rather than your wrist) in natural daylight for best results. With the pandemic placing extra emphasis on cleanliness, it’s safer to bring home (or order) a test sample of your chosen colour before buying the full-size, so ask in-store or look for these online.
This useful website also offers suggestions on colours that match up with makeup you’ve previously used - so if you’re new to foundation but have a favourite concealer, it could help you find the perfect match.
5. Makeup Tools
The level of coverage and overall effect you produce will also depend on which tools you use. In general, “compact” foundations such as powder and cream tend to work well with sponge beauty blenders - while those using liquid or mousse formulations get best results from using a brush.
Brushes
For foundation application, there are three main brushes you can use: a stippling brush, which is used to gently press foundation into the skin, a fanned-out foundation brush for blending, and a kabuki brush, which tends only to be used with mineral foundation.
Blenders
While brushes have their benefits, beauty blenders tend to be preferred by beginners for their ease of use and come in a range of shapes and sizes. Most blenders come in sponge formula - although you can also get silicone blenders to gently bounce, blend and buff foundation for an even finish.
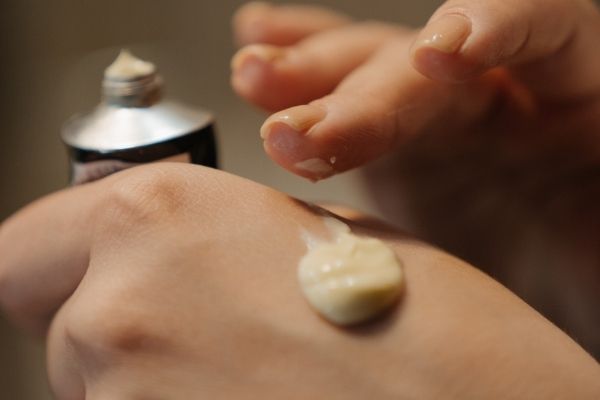
Fingertips
Last but not least - in a pinch, using clean hands to distribute foundation can work equally as well as using makeup tools (and in some cases it works even better). Warming your hands first before applying your makeup allows for a more natural look.
6. Primer
Primer is applied underneath the foundation in order to help it stay put and to give it a more even finish. Some primers boast skin-nourishing benefits, some illuminate, some colour correct - and others claim to minimise pores and mattify the skin. Apply a pea-sized amount with your fingertips after moisturising and blend all over your face. Once absorbed, you’re ready to apply your foundation.
7. Application Method
Regardless of the formula or tools you use, how you apply your foundation is similar in principle: start with a few dots in the centre of your face and blend outwards, not forgetting the hairline and ears and blending all the way down to the neck to avoid any harsh lines of demarcation (also known as “tide marks”).
There will be a few variations to this depending on which formula you use - and some makeup tools work better with some formulas than others: for cream, mousse or liquid foundations, a beauty blender is typically best - and brushes can be used to sweep on liquid and powder formulas - while fingertip application can be used for pretty much every type of foundation there is.
8. Concealer: Before, or After?
There are two schools of thought when it comes to applying concealer, namely over - or under foundation application. While the general consensus has always been to dot on concealer after applying foundation, applying it beforehand works well for instances where you need to colour correct. Use a liquid formula and blend well, allowing it to dry before applying the rest of your makeup.
9. Set it in Place
To prevent your foundation from slipping, dust translucent powder over your T-Zone (where the skin tends to accumulate oil first) with a fluffy brush, tapping off the excess before applying. If your skin is especially oily (or in humid or warm weather), some makeup artists advocate for dusting a thin layer on before applying your foundation - although how effective this is will depend on the formula of foundation you are using.
Setting Sprays
Setting sprays come in a range of finishes, from matte to dewy - but on oilier skins they tend not to be as effective as powder. Experiment with using either one (you can also try using setting spray followed by powder) to see which gives your foundation the most staying power.
Hopefully by now we’ve helped to demystify foundations for you - but if you still in any doubt, beauty counter reps at your local department store can usually advise on which formulas and shades are suitable for your skin, whether it’s oily, dry or somewhere in between.


Comments